Yin yoga is the quiet side of the practice. There is no rushing between poses, no breathless sun salutations and no sweating through a vinyasa flow. Instead, you settle into a handful of floor-based postures and stay there, letting gravity and time do the work while your breath slows down.
That slowness is exactly why yin is such a good fit for home practice. You do not need a heated studio, a teacher calling out cues or much space at all. A mat, a couple of cushions and twenty or thirty minutes are enough to start.
Let's look at what yin yoga is, how to practise it safely, and ten easy poses you can try tonight.
What Is Yin Yoga?
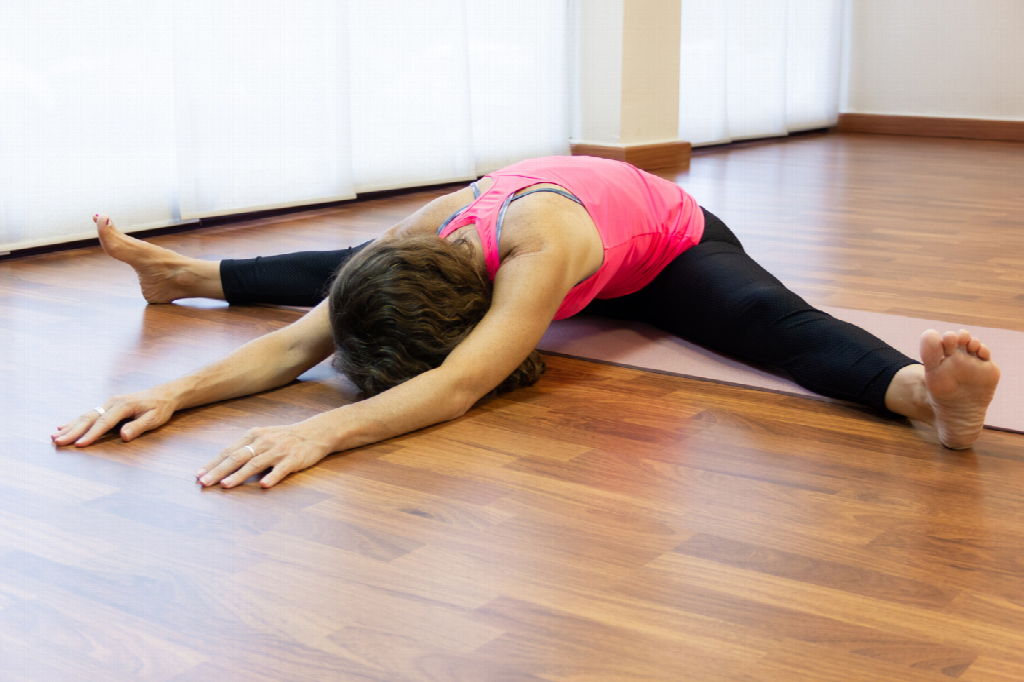
Yin yoga is a slow style of yoga in which you hold mostly seated and lying poses for several minutes at a time, with the muscles as relaxed as possible. Where more active styles focus on muscular strength and movement, yin aims to apply gentle, sustained stress to the deeper connective tissues around the hips, pelvis and lower spine.
The style grew from the work of teachers such as Paulie Zink, Paul Grilley and Sarah Powers, who combined long-held floor postures with ideas from traditional Chinese medicine and Taoist practice. Today, many people use yin as a counterbalance to busy days, hard training or more dynamic yoga classes.
The Three Principles of a Yin Practice
Find your edge: Move into the pose until you feel a mild, comfortable stretch, then stop. You should be able to breathe easily. Sharp, burning or electric sensations are a sign to back off.
Be still: Once you have found your shape, let your muscles soften and try not to fidget. Small adjustments are fine if something feels wrong.
Hold for time: Many teachers suggest holding each pose for around three to five minutes. If you are new, one to three minutes is plenty, and you can build up gradually.
When you come out of a pose, move slowly. Take a few breaths lying flat or sitting quietly before you move into the next shape, so your body has time to adjust.
What You Need to Practise at Home?
You don't need any special equipment. Here are a few simple props that can make the poses more comfortable:
A yoga mat or a folded blanket on a carpeted floor.
Cushions or a bolster to support your knees, hips or chest.
Two yoga blocks, or sturdy books, for poses like supported bridge.
A timer so you can relax instead of checking the clock.
A quiet corner with soft lighting and, if you like, calm music.
10 Easy Yin Yoga Poses to Try at Home
1. Butterfly
Butterfly is a seated forward fold that gently targets the inner thighs, hips and lower back. It is a classic way to begin a yin practice.
Sit on the floor and bring the soles of your feet together, then slide them a comfortable distance away from your body so your legs form a diamond shape. Let your knees fall open and slowly round your spine forward, letting your head hang. If your knees feel strained, place cushions under them. If your lower back is sensitive, sit on a folded blanket to tilt the pelvis forward.
2. Child's Pose
Child's pose is a restful shape that releases the lower back and hips and gives your body a chance to settle between stronger poses.
Kneel with your big toes touching and your knees as wide as your mat, or together if that feels better. Sit back towards your heels and fold forward, resting your forehead on the floor or a cushion. Let your arms stretch forward or rest beside your body. A bolster under your chest turns this into a very comfortable, supported rest.
3. Caterpillar
Caterpillar is the yin version of a seated forward bend, with a soft, rounded spine. It focuses on the back of the legs and along the spine.
Sit with your legs stretched out in front of you, hip-width apart or together. Bend your knees as much as you need and let your upper body fold forward without forcing it. A rolled blanket under your knees takes pressure off tight hamstrings. Rest your hands on your shins or the floor and let your head hang heavy.
4. Sphinx
Sphinx is a gentle backbend that compresses the lower back slightly, which is a useful counterbalance after forward folds.
Lie on your stomach and bring your elbows under your shoulders, forearms resting on the mat. Let your lower back and legs relax completely. If the bend feels too strong, slide your elbows further forward. If it feels too mild and comfortable, you can press up onto straight arms, a variation called seal, but only if your lower back is happy.
5. Dragon
Dragon is a low lunge that opens the front of the hips, an area that often tightens after long hours of sitting.
From all fours, step one foot forward between your hands and slide the back knee gently behind you, resting it on the mat or a folded blanket. Keep your hands on the floor or on blocks either side of your front foot. Let your hips sink slowly forward and down. Hold, then switch sides. If your back knee is sensitive, add more padding underneath.
6. Supported Bridge
Supported bridge is a mild, restful backbend that lets the front of the hips and the chest open without any effort.
Lie on your back with your knees bent and feet flat on the floor. Lift your hips and slide a yoga block, or a firm cushion, under the flat part of your lower back just above your tailbone. Rest your weight on the support and let your arms relax by your sides. To come out, lift your hips, remove the block and lower down slowly.
7. Banana
Banana is a lying side stretch that targets the side of the body from the hips up to the shoulders. It feels simple but can be surprisingly deep.
Lie on your back with your legs straight. Walk your feet and legs a little to one side, then walk your upper body towards the same side, so your body forms a gentle crescent, like a banana. Keep both hips on the floor. Rest your arms overhead if that is comfortable. Hold, then curve the other way.
8. Reclining Twist
The reclining twist gives the spine a gentle rotation and is a calming way to release tension in the back and hips.
Lie on your back and hug your knees towards your chest. Let both knees fall to one side, resting them on the floor or on a cushion if they do not reach. Stretch your arms out to the sides and, if your neck is comfortable, turn your head the opposite way. Hold, then bring the knees back through the centre and repeat on the other side.
9. Happy Baby
Happy baby gently opens the hips and the lower back while you lie on the floor, and it is usually comfortable even for stiff beginners.
Lie on your back, bend your knees towards your chest and hold the outsides of your feet, your ankles or the backs of your thighs. Let your knees open wider than your torso and your lower back rest heavy on the mat. If you cannot reach your feet comfortably, hold behind your knees instead. Rocking gently from side to side is fine.
10. Legs Up the Wall
Legs up the wall is a soothing way to finish your practice, with your legs resting above your heart and your whole body supported.
Sit with one hip close to a wall, then lie back as you swing both legs up so they rest against it. Shuffle your hips as close to the wall as feels comfortable; there is no need to touch it. A folded blanket under the hips can add comfort. Let your arms rest by your sides, close your eyes and breathe slowly.
A Simple 30-Minute Yin Sequence
If you are not sure where to start, try the ten poses in this order, holding each for two to three minutes and switching sides where needed:
Butterfly
Caterpillar
Child's pose
Sphinx
Dragon (each side)
Supported bridge
Banana (each side)
Reclining twist (each side)
Happy baby
Legs up the wall
Finish with a few minutes lying flat on your back, breathing naturally, before you get up.
Who Is Yin Yoga For?
Yin yoga suits a wide range of people, which is one of the reasons it has become so popular. It is a good fit for:
People who sit for long hours and feel stiff in the hips and lower back.
Runners, surfers, gym-goers and other active people who want a gentle counterbalance to training.
Anyone who finds it hard to switch off and would like a slower, calmer practice.
Beginners who want to start yoga without fast transitions or complex sequences.
When to Check with a Professional First?
Yin yoga is gentle, but it is not right for every body in every situation. Holding a pose for several minutes can irritate an injury, an unstable joint or a sensitive back if you push too far.
Speak to a doctor or physiotherapist before you start if you are recovering from surgery or a recent injury, live with joint hypermobility, osteoporosis or chronic back pain, or are pregnant. If a pose causes pain rather than a mild stretch, stop and rest. If you are in the south of Bali and want a movement assessment before building a home routine, a physio in uluwatu can look at how you move and help you adapt poses around an injury or a chronic condition.
A Final Word
Yin yoga asks very little of you: a quiet space, a few props and the patience to stay still. In return, it offers a slower rhythm, softer hips and a calmer mind at the end of a long day.
Start with two or three of the poses on this list, hold them for a minute or two and see how you feel. Over time, you can lengthen the holds, try the full sequence and build a practice that fits easily into your evening routine.
Frequently Asked Questions
How long should you hold a yin yoga pose?
Many teachers suggest holding yin poses for around three to five minutes. Beginners can start with one to three minutes and build up gradually as the body adapts.
Can beginners do yin yoga at home?
Yes. Yin yoga uses simple, mostly floor-based poses and slow transitions, so it is well suited to beginners practising at home. Use cushions or blocks for support and stay within a mild, comfortable stretch.
How is yin yoga different from yang or vinyasa yoga?
Yin yoga holds relaxed, passive poses for several minutes to target deeper connective tissue. Yang styles such as vinyasa use active, flowing movement and muscular effort, with each pose held for a few breaths.
How often should you practise yin yoga?
There is no fixed rule. Two or three short sessions a week is a comfortable start, and many people enjoy a few poses most evenings to wind down before bed.
Is it normal to feel sore after yin yoga?
Mild tenderness can happen when you are new to long holds, especially around the hips. Sharp or lasting pain is not normal, so ease off, use more props and check with a professional if it continues.
Do you need props for yin yoga?
Props are not essential, but they make many poses more comfortable. Cushions, a folded blanket and a pair of yoga blocks or sturdy books are enough for home practice.