
How to Choose Gym Flooring for a Safer, Quieter Home Gym
Two concerns usually push a parent to rethink the floor of a home gym. The first is safety: nobody wants a slipped step near a loaded barbell, or a toddler face-planting on bare concrete. The second is peace and quiet: an early workout should not wake the kids down the hall or rattle the neighbors.
The good news is that both goals come down to the same set of choices. This guide walks through how to pick flooring by training style, subfloor, and noise needs without overspending or overbuilding a room you simply want to use. You will learn what reduces sound, where standards help, and how to layer materials only where they matter.
Why the Floor Matters More Than the Color
The surface under your feet affects three things. It shapes safety through traction and shock absorption, so a slick or overly soft floor can make heavy lifts feel unstable. It affects whether your workout disturbs sleeping kids or people below you, because dropped weights create impact noise that travels through the structure. It also protects your equipment and the room from dents and cracks.
Industry standards can help you compare options without guessing. ASTM F2772 sets performance levels for indoor sports floor systems, including shock absorption and surface friction. For noise, the ratings you will see are IIC for impact sound and STC for airborne sound. Keep one point in mind from the start: those numbers describe a full tested assembly, not a product by itself. The same mat can perform differently depending on what sits under and around it.
Step 1: Map Your Room and Subfloor
Before you shop, measure the usable area, ceiling height, door swing, and whether a thicker floor will block anything. Note whether the room sits at grade, upstairs, or over a basement, and identify the subfloor: concrete slab, wood joists, vinyl plank over wood, or carpet.
Load matters too, especially upstairs. Most US residential codes assume a 40 pounds-per-square-foot live load for living spaces and allow 30 pounds-per-square-foot in bedrooms. That is context, not an engineering verdict. Spread heavy gear out, avoid concentrating a loaded rack on one point, and consult a professional before placing serious weight on an upper floor.
Step 2: Pick Your Surface by Training Needs
Name your main training style, then match it to a surface family and thickness range. Treat the figures below as typical vendor guidance tied to a use case, not fixed rules.
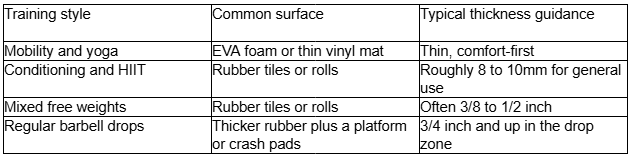
Heavier training does not mean you need the thickest material across the whole room. It usually means adding protection at the point of impact. If you are comparing rubber tiles, interlocking mats, turf lanes, or a deadlift platform build, a local supplier with installation experience can help you scope thickness and layout. For readers in Perth, WA, Kinta Fitness offers a gym flooring range you can review before you measure and buy.
Step 3: Make It Quieter (What Actually Works)
There are two kinds of noise to manage. Impact noise comes from weights and feet hitting the floor and travels through the structure. Airborne noise is sound moving through the air, such as a fan or music. Most home gym complaints are about impact noise.
Think in layers. Start with thicker rubber and a defined drop zone so the loudest activity happens on the most absorbent spot. Next, consider a decoupled underlayment beneath a finish floor, where IIC becomes useful as an assembly metric. For example, a tested build using a quarter-inch rubber underlayment over six-inch concrete reached STC 50, IIC 56, and delta-IIC 25. That is a specific tested assembly, not a promise for your room.
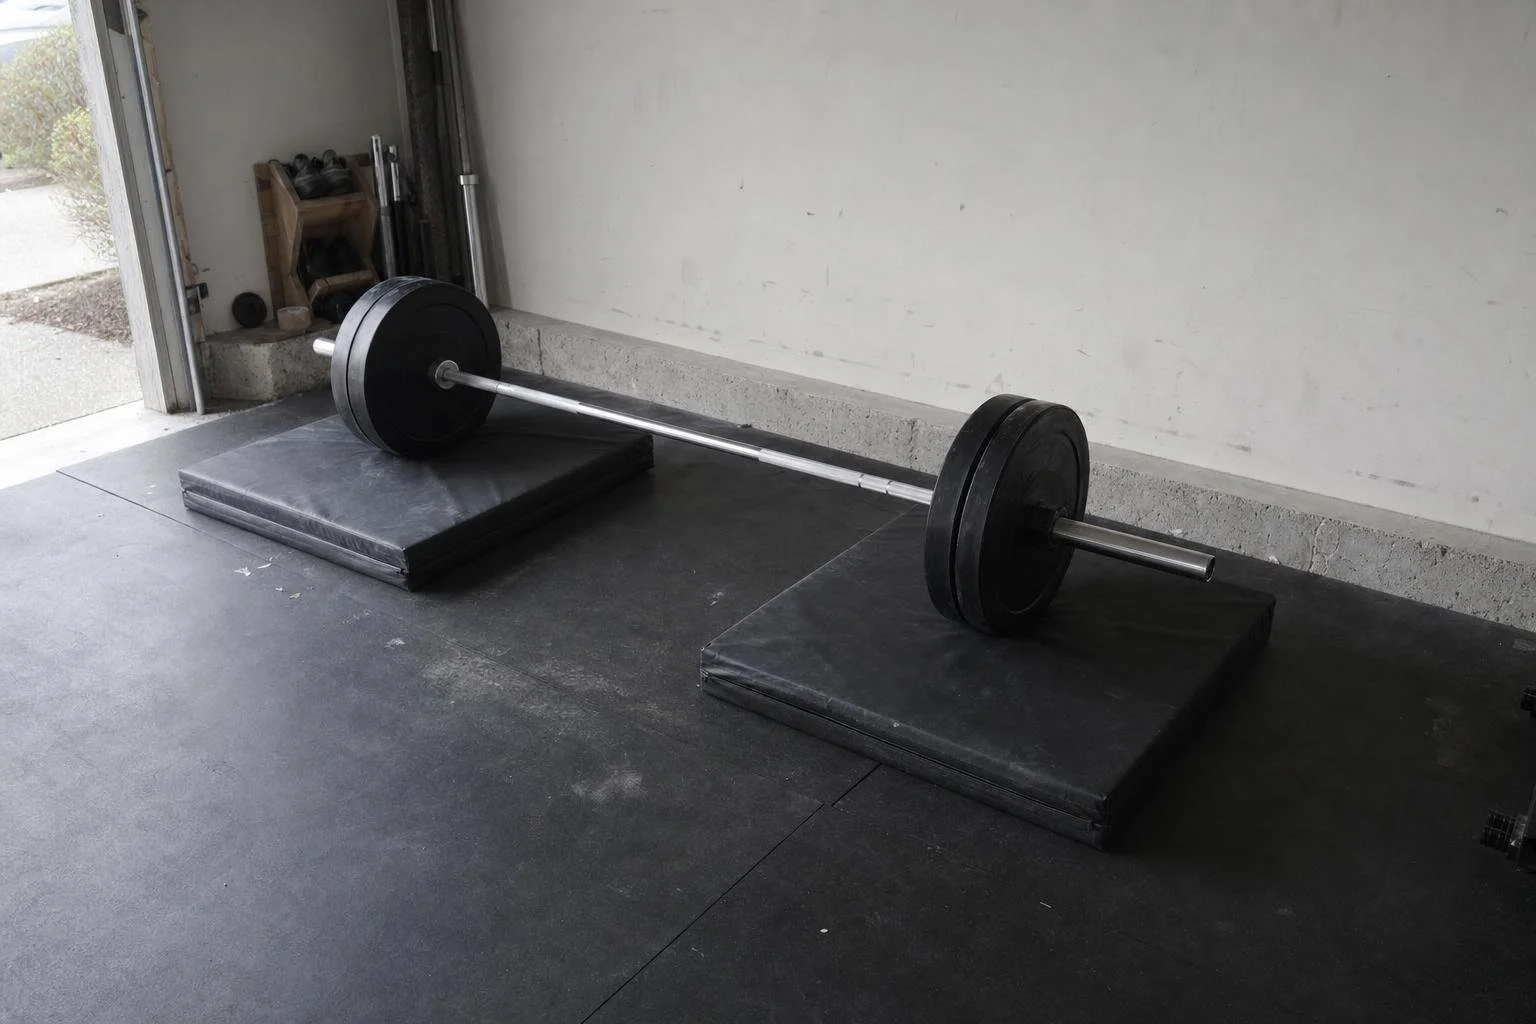
Finally, treat the point of impact directly. Crash cushions under a barbell can cut sound and vibration at the source, and a plywood-and-rubber deadlift platform can do similar work. Manage expectations: multifamily code references target IIC 50 in lab tests and 45 in the field, and stacking products does not add their ratings together. You are reducing noise, not eliminating it.
Step 4: Traction and Safety in Plain English
ASTM F2772 describes how an indoor sports floor system performs across properties like shock absorption, vertical deformation, surface friction, and ball rebound. For shoppers, the shock-absorption tiers are often the most useful: Class 3 floors target at least 40 percent force reduction, and Class 4 at least 50 percent.
In everyday terms, more shock absorption means a softer feel and lower peak forces on joints. The tradeoff is stability. A very soft surface can feel less secure under a heavy squat or deadlift, so the ideal floor for jumping is not always ideal for maximal lifting. Ask the seller for F2772 data or an independent test sheet rather than accepting a vague claim.
Step 5: Installation Formats and Adhesives
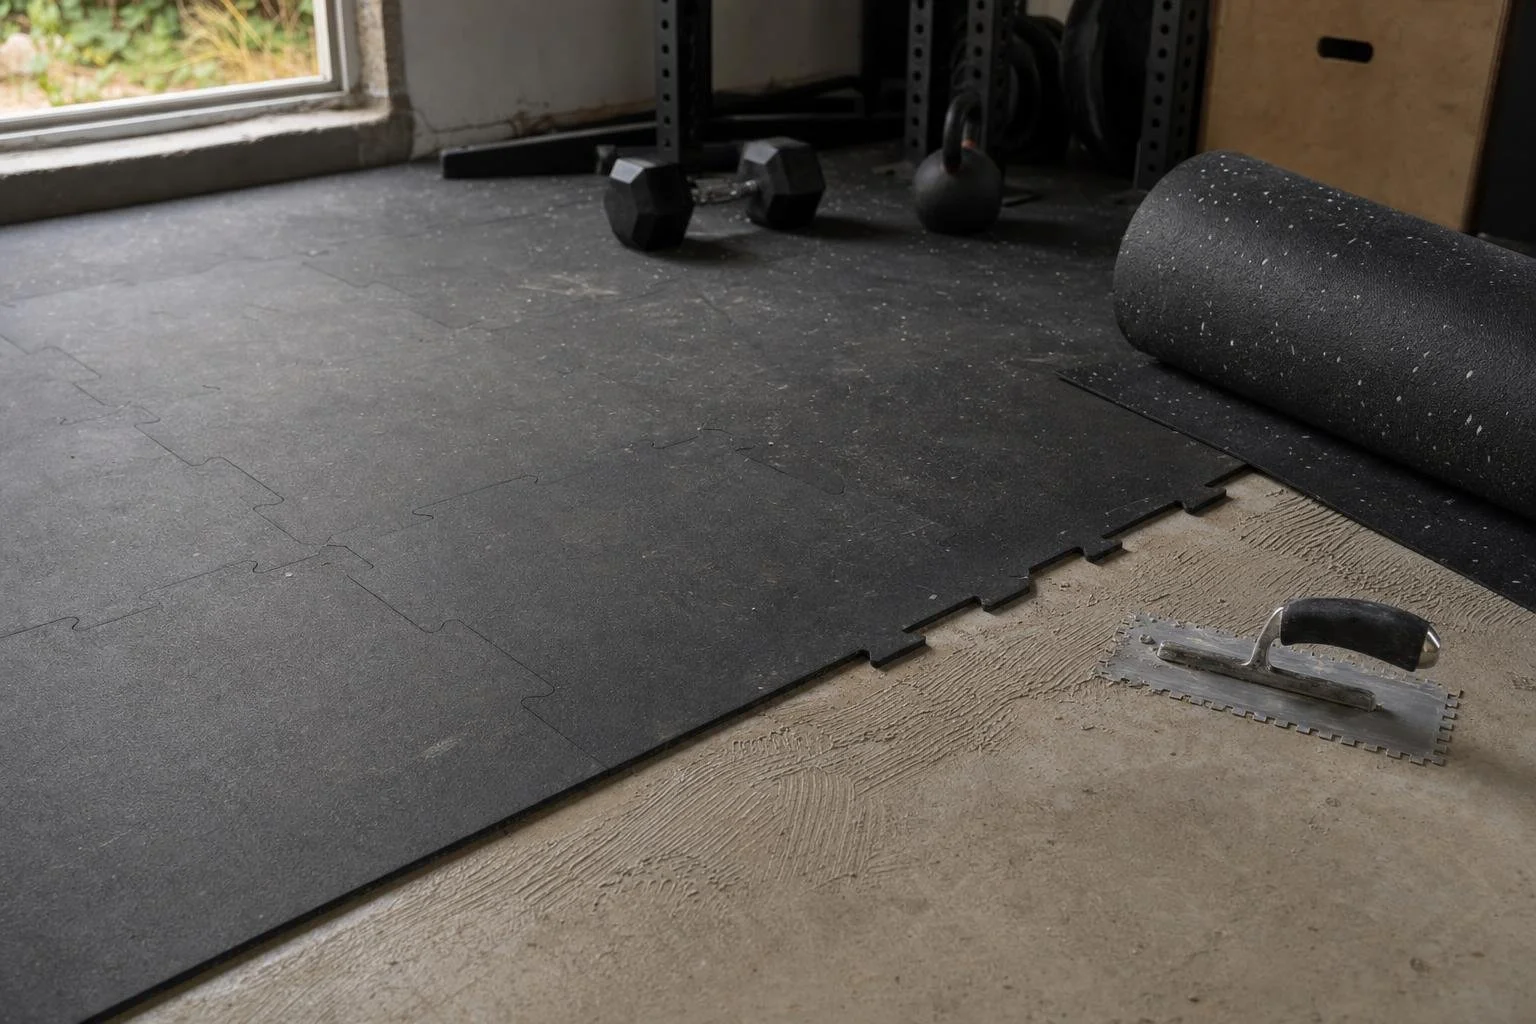
Each format has a different use case. Interlocking tiles and loose-lay rolls suit renters and anyone who may remove or reconfigure the floor later. Glued-down rubber gives a seamless, stable result but is a bigger commitment.
Interlocking tiles: easy to fit and replace, but seams can shift under heavy dragging.
Rolls: fewer seams over large areas, though they can be heavy and awkward to cut and position.
Platforms: a targeted way to handle drops without upsizing the whole floor.
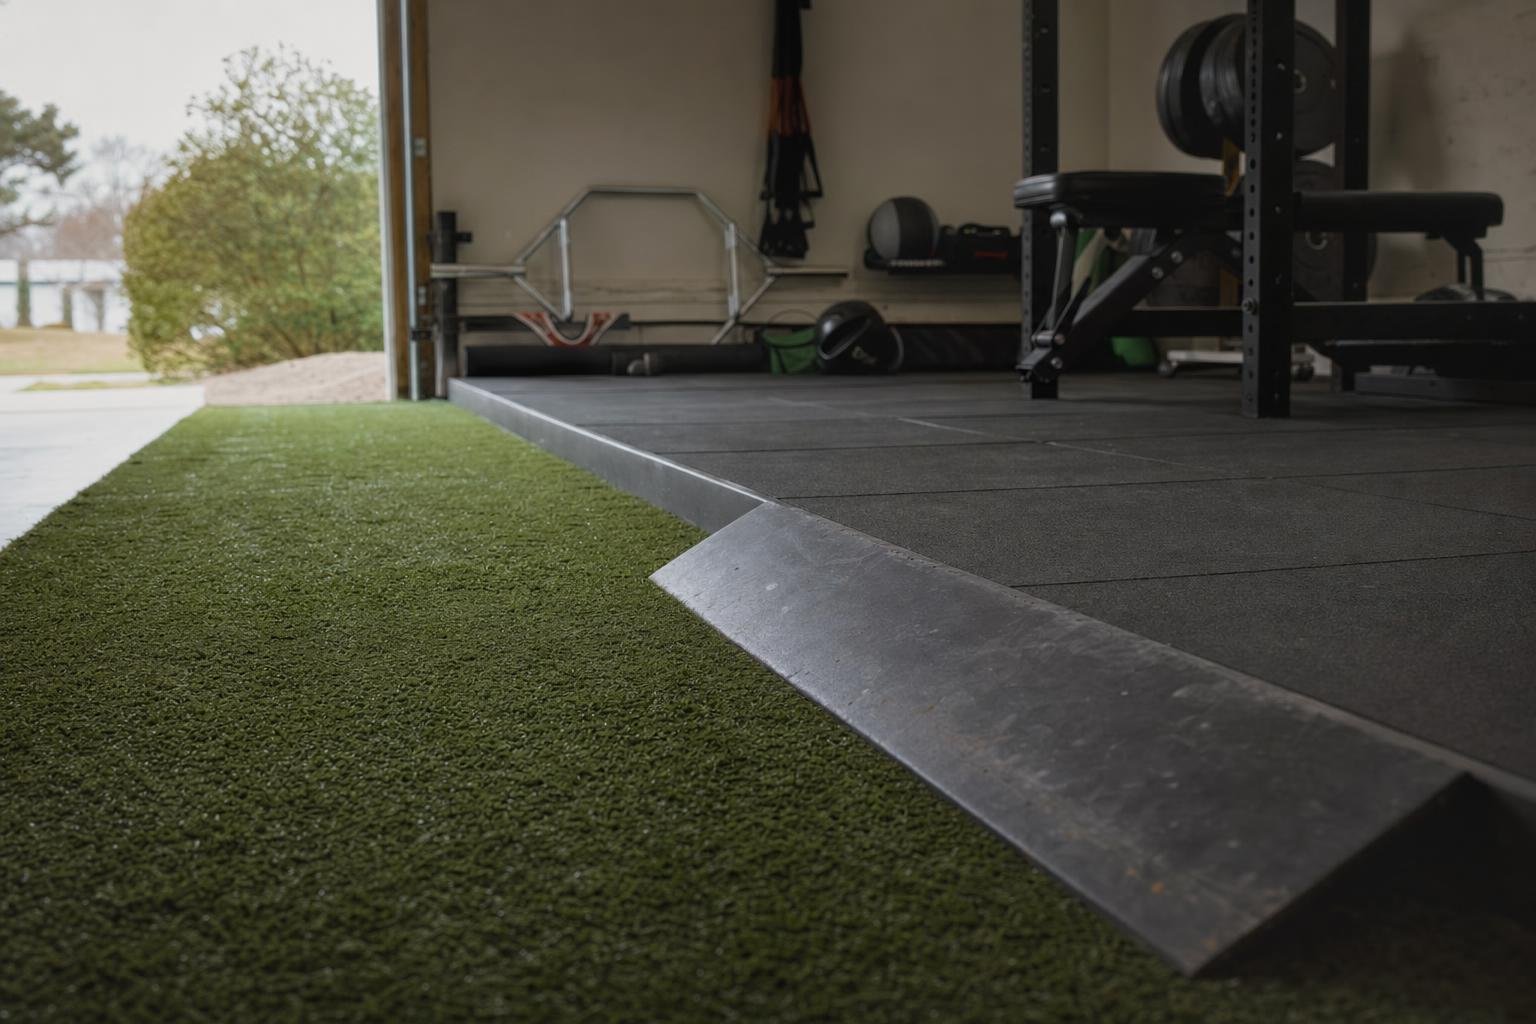
Turf lanes: useful for sled pushes and dynamic work in a defined strip.
For permanent installs, zero-VOC urethane rubber-flooring adhesives are available and can reduce odor during application. Follow the manufacturer's instructions on cure time and ventilation, and keep traffic off the floor until the adhesive has cured. In areas kids use, plan for door undercuts and low transition ramps so raised edges do not become trip hazards.
Step 6: Subfloor Specifics
Over a concrete slab, prioritize thickness and drop-zone layering, since the slab itself does most of the structural work. In basements and garages, add a moisture check and plan for easy cleanup.
Over wood joists, vibration and transfer are the bigger concern. An underlay or decoupling layer can help, and spreading weight matters for heavy setups.
Over carpet, remove the pad first or add a floating plywood layer before laying rubber. Rubber straight over carpet padding can feel spongy under load and leave imprints. A firm base keeps footing predictable.
Step 7: Mix and Match by Zone
You rarely need one surface everywhere. A common layout puts rubber under the rack and dumbbell area, a turf strip for sled and core work, and a thinner vinyl or EVA mat where you do yoga or mobility. Crash pads or a platform go only where you actually drop weight.
Before ordering, tape out the layout, walk through a typical session, and avoid buying thick material for a corner that only holds a foam roller.
Care That Preserves Grip and Air Quality
Cleaning affects safety and lifespan. Manufacturer guidance for rubber sports floors generally calls for neutral-pH cleaners. Remove dry soil first, then damp clean, and avoid chlorine or harsh solvents that can degrade rubber and affect traction.
Budgeting Without False Precision
Thickness and format drive cost more than color. Often the smartest spend is a modest floor across the room plus a purpose-built platform or crash pads in the drop zone, rather than upsizing everything for one loaded barbell. This is also where broader home gym planning helps, because flooring choices should fit the space, storage, and budget decisions around the room.
A Quick Decision Path
Combine four factors: subfloor, training style, noise sensitivity, and how permanent you want the setup. Upstairs heavy lifting usually needs rubber, decoupling, and crash pads or a platform. A garage renter may choose interlocking rubber tiles, while a mobility-focused spare room can stay thinner until weights enter the plan.
Where to Buy or Consult
When you are ready, a local supplier that also handles installation can help confirm thickness and layout for your exact room and subfloor. Bring your measurements, training mix, and noise concerns. A good supplier will talk through formats and drop-zone protection rather than pushing the most expensive option.
If you are in Western Australia, Kinta Fitness is a practical option to include in that conversation because it can help match flooring formats to home gym use cases.
Bringing It Together
A safer, quieter home gym rarely comes from one major purchase. It comes from matching the surface to how you train, respecting your subfloor, and layering impact control where weights land. Measure twice, protect the drop zone, and use ASTM F2772 and IIC to compare real test data. Do that, and you protect the house and keep the peace.